Getting started
This page walks you from a fresh install to your first exported video. It assumes Drift is already installed and open.
1. Choose a video layout
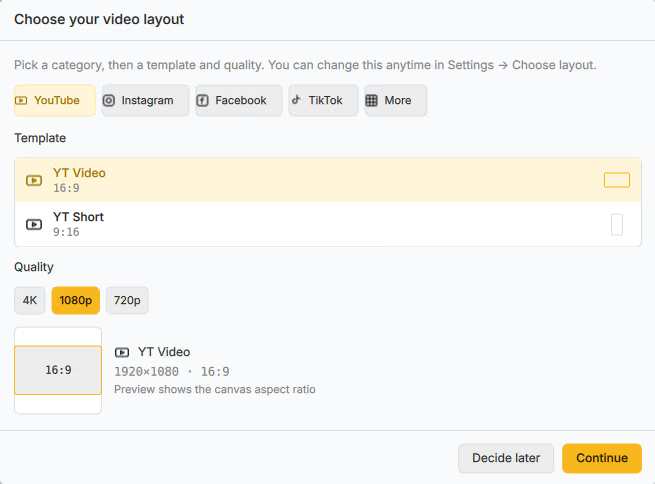
On first launch (or when you start a new project), Drift asks you to Choose your video layout. Pick a platform template — YouTube, Instagram, TikTok, and more — and a quality (4K, 1080p, or 720p), then click Continue.
Choose Decide later to keep the default size; you can change it anytime in Settings.
2. Import media
Open the Media tab in the assets panel (left), then:
- Click Import, or
- Drag video, audio, or image files onto the Media tab.
Supported types include MP4, MOV, MKV, WebM, MP3, WAV, PNG, JPG, GIF, and more. Imported items appear as thumbnails you can drag onto the timeline.
See Media library for every assets tab.
3. Build on the timeline
Drag a clip from Media onto a video track. Use the timeline tools to shape it:
| Tool | What it does | Key |
|---|---|---|
| Select | Move and select clips | V |
| Cut | Click a clip to split it | B |
| Trim start / Trim end | Drop everything left or right of the click | — |
Press Space to play or pause. Drag clip edges to trim. Enable snapping and ripple from the timeline toolbar when you want edges to stick and gaps to close.
More detail: Timeline.
4. Polish the look
Select a clip and use the Properties panel on the right:
- Position & size — place, scale, rotate, flip.
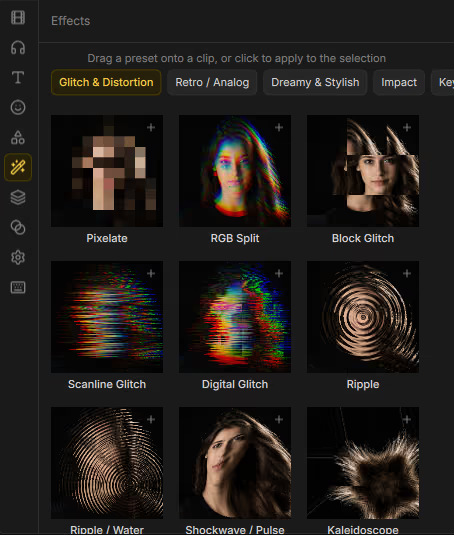
- Effects — browse GPU effects from the Effects assets tab, or apply from Properties.
- Speed & Fade — change speed, reverse, fade in/out.
- Text / Stickers / Shapes — add overlays from their assets tabs.
See Editing clips and Clip tools.
5. Export
Click Export in the header. Pick a downscale size (or keep the project size), optionally open Advanced for encoder and quality, then choose a save location and click Export.
Drift exports what you see in the preview. Full options: Export.